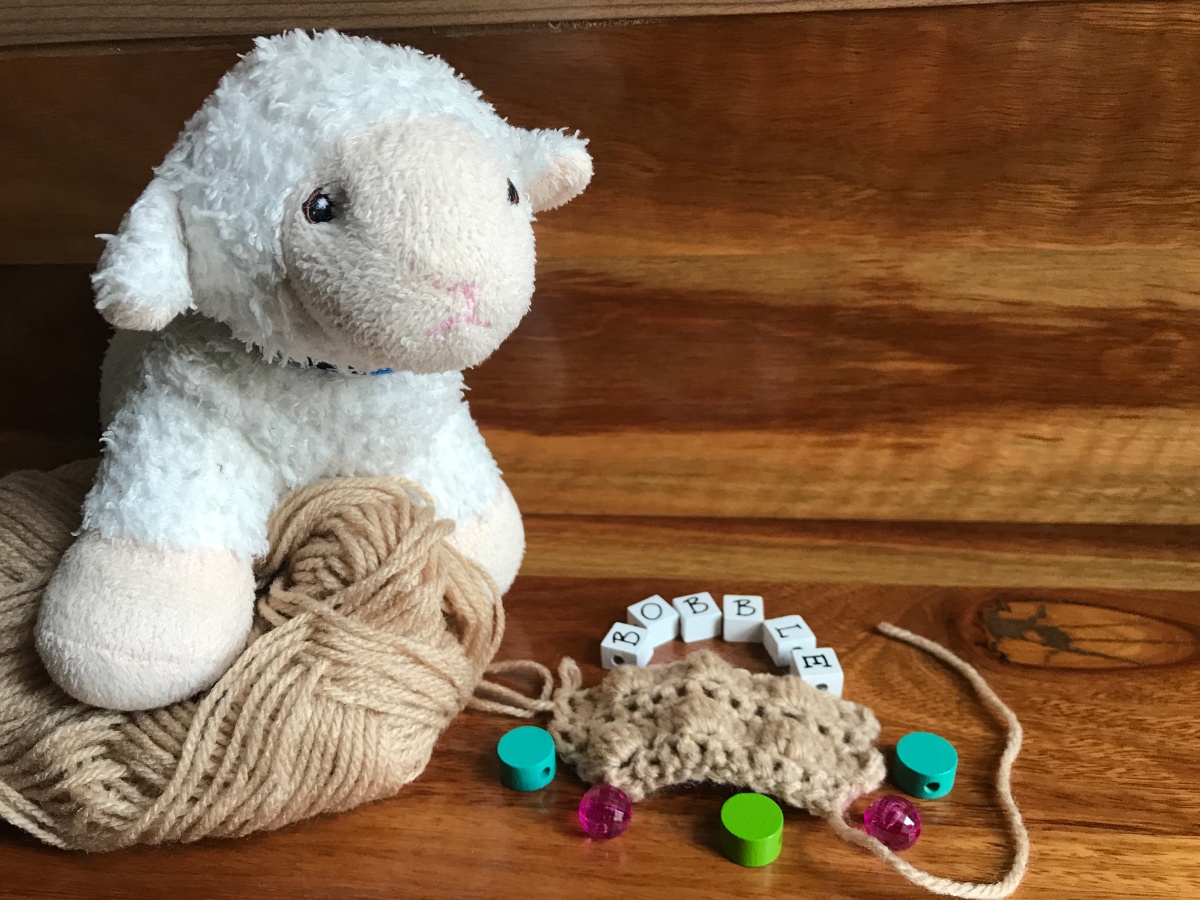
Bobbles, bobbles, bobbles …

I know it is a festive season, but why not to make something special like a little toy sheep as an addition to your Nativity Set?

Ok, it might be a bit late for this year Xmas I know 🙂 but never late for next year Christmas or an upcoming Easter ! 😀

A beautiful free pattern for sheep toy worked in Bobble Stitch, developed by Kristi, and it can be found on her website here http://engsidrun.spire.ee/blogs/blog1.php/bobble-sheep

The sheep skin is curly and bobbly so that is why this article will explain how to make a Bobble Stitch also known as a Cluster stitch.

Usage

You do not need to crochet only sheep using a bobble stitches. Bobble stitch has a many uses among creating an amigurumi sheep toy. It is also a very pretty as an edging too!

Winter garments like mittens, scarfs, hats, bulky jumpers, hand bags or home decorative items e.g. blankets, coasters, face washers, scrubbers, rugs or cushion covers a beautiful in Bobble stitch and I bet after this special tutorial you will have a go on some of these projects soon!

It has plenty of texture on its own so you can crochet in monochrome (one colour only), but also it can be used on multicoloured projects and it still looks good.

Bobble stitch is versatile, just remember it has a texture so it is better used on a projects when thickness & warmth is needed. Not so much good for summer tops…

Iva’s Tips

  • Yarn Usage – So you like the bobbles, ok then. Make sure that you do have plenty of yarn on hand as bobble stitch uses a lot more yarn than any other stitch out there.
  • The Wrong Side is the good side. Yes, Bobble stitch is usually worked on the wrong side rows.
  • You want to show off you Bobbles? – Split the bobbles with some smaller stitch – single crochet stitch will work just fine. Make 1 x  bobble, 2 x SC, 1 x bobble and repeat. The bobbles will stand out more. Experiment as you like :).

How To Make Bobble Stitch

  1. I worked chain of 13 CH (10 x CH base with 3 CH turing ). First row starts in the 4th stitch form the hook and the entire row is worked in double crochet DC till the end. Read my previsous article about how to make DC stitch https://yarnonhook.com/2018/11/16/how-to-make-double-crochet-dc-treble-crochet-tr-stitch/
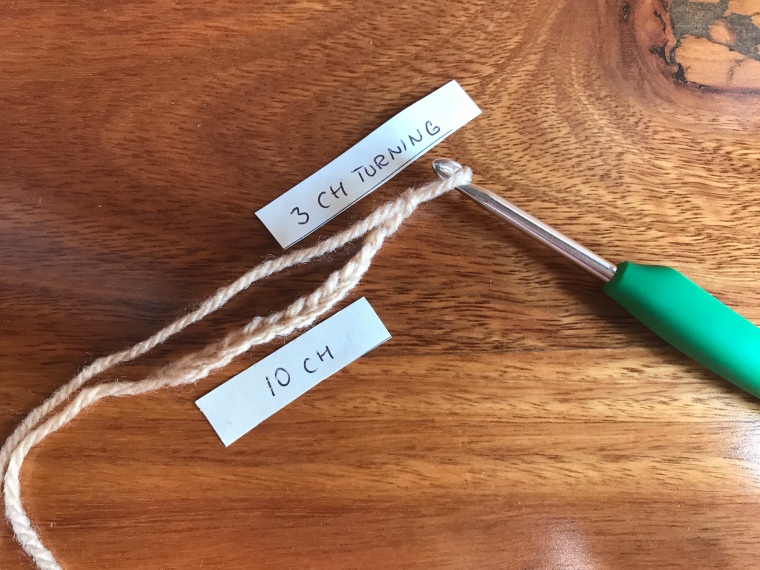
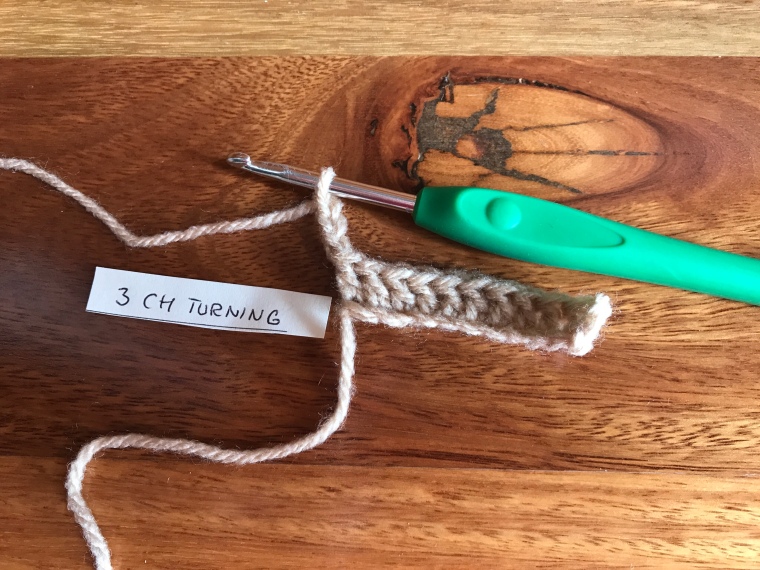
2. 3 CH for turning and turn the work – the wrong side (the good side to make the bobbles :))
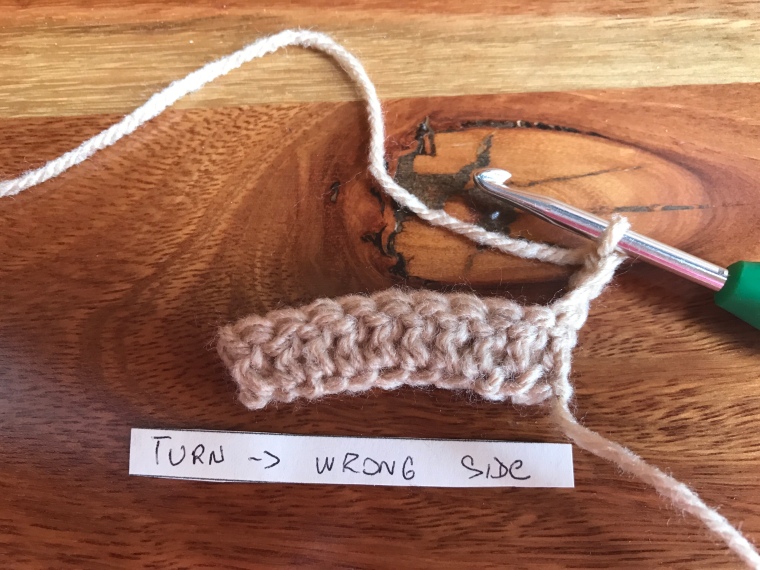
3. On a wrong side row, stitch to the position for the planned bobble. I did 2               x DC in order not to have the bobbles straight away on the edge of the project.

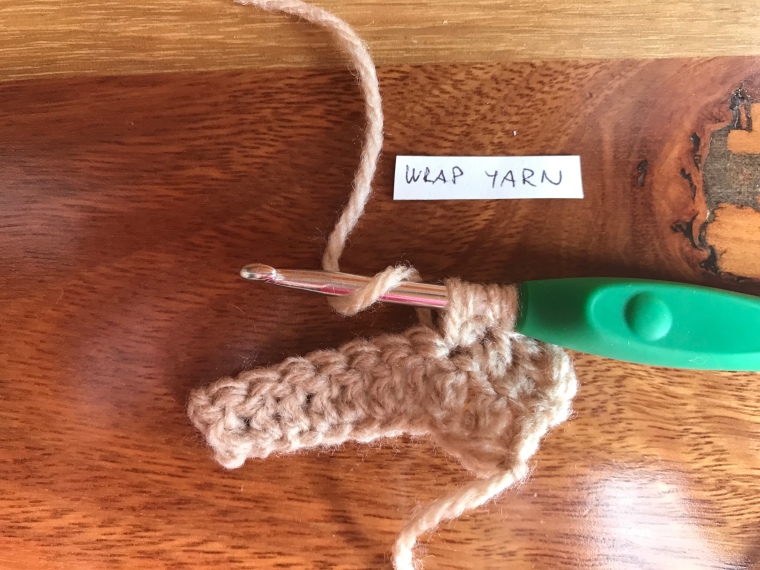
4. Wrap the yarn.

5. Take the hook, from front to back, through the top of the next stitch of the previous row.

6. Again, wrap the yarn, from the back to front, over the hook.

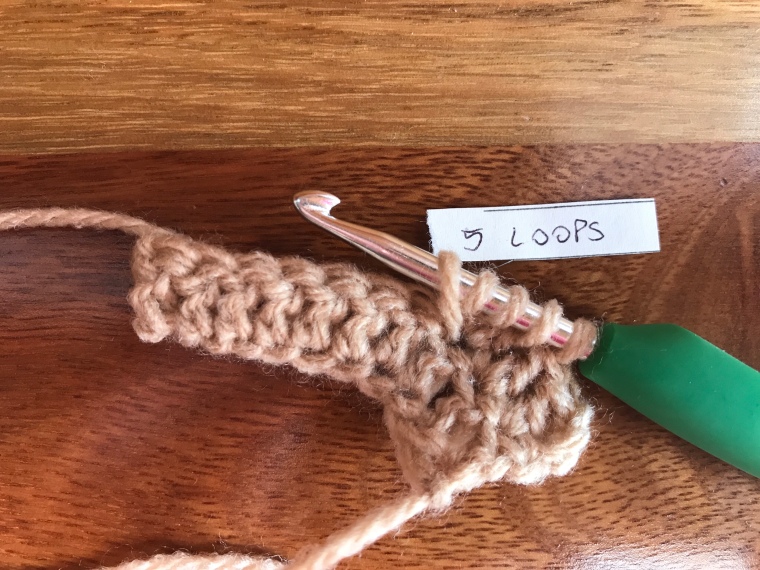
7. Draw the hook backwards to pull the loop through the top of the stitch. There are loops on the hook.

8. Wrap the yarn.

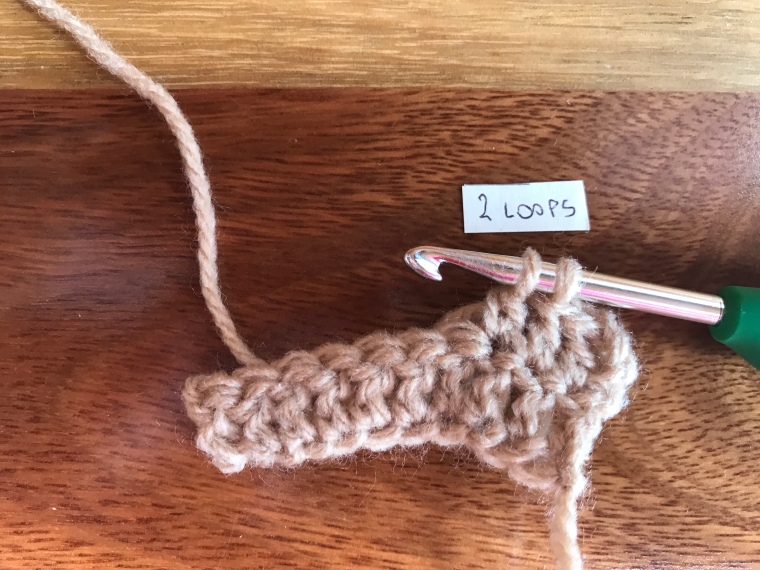
9. Draw the hook backwards to pull the loop through the first two loops on the hook.  2 loops remain on the hook.

10. Wrap the yarn. 

11. Take the hook, from front to back through the top of the same stitch as before.

12. Wrap the yarn.

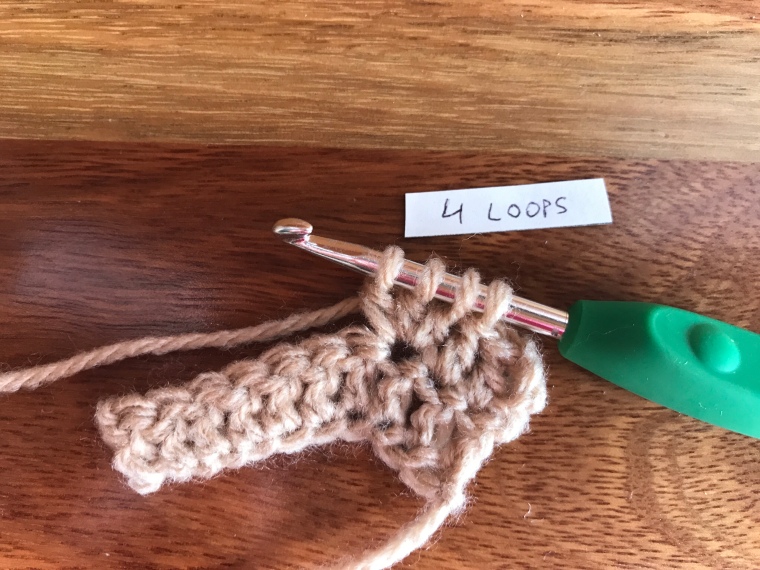
13. Draw the hook backwards to pull the yarn through the top of the stitch of the previous row. You have 4 loops on the hook.

14. Repeat steps 8 – 9. You will have 3 loops on the hook.

15. Follow steps 10 – 14, work 3 more stitches in the same manner. You will have 6 loops on the hook. Make sure that you always inserting the hook back to the same stitch !!

16. Wrap the yarn.
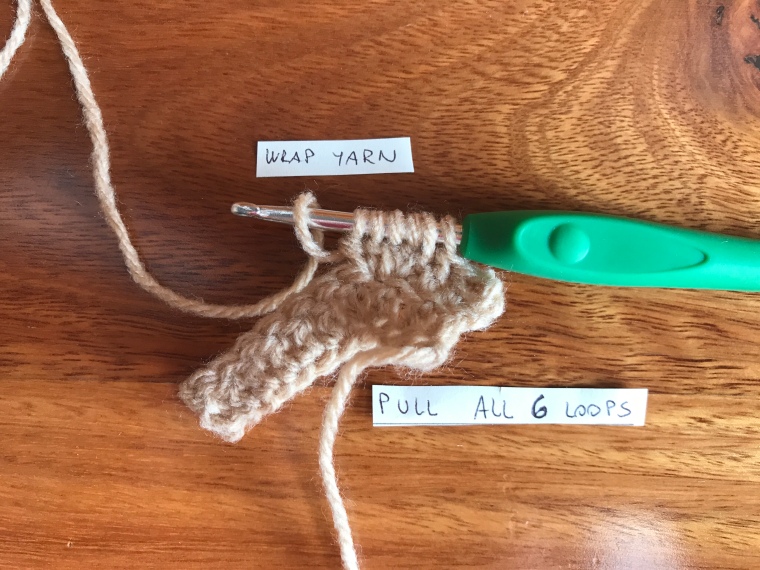
17. Draw the hook backwards to pull the yarn trhough ALL the loops on the hook.

18. Wrap the yarn.

19. Draw the hook backwards to pull the yarn the remaining 1 loop on the hook – completing and securing the bobble.
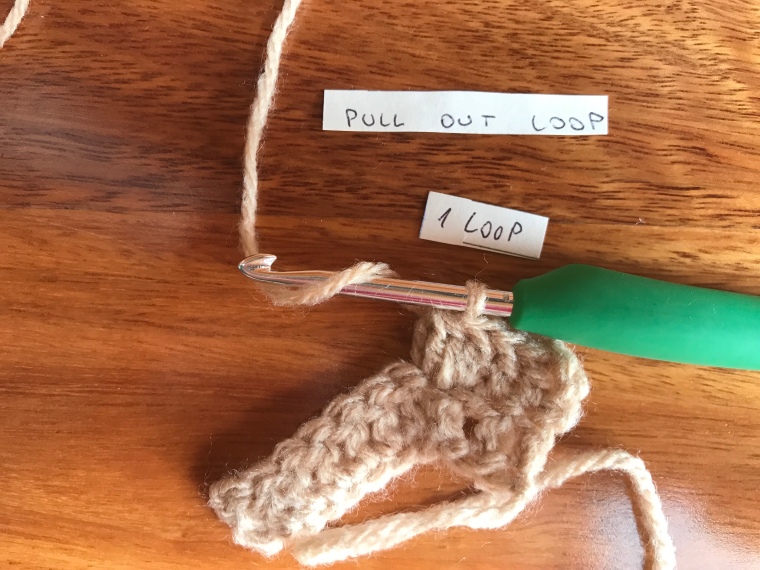
20. Continue with the next stitch either bobbling or make some spaces with SC or DC in between if you want to spread the bobbles a little bit.

For demonstration, I split them 2 x DC apart. I am turning with 3CH at the end, but inserting into the same stitch, when I turn.

Also I worked bobbles only on the WRONG SIDE of my project. That means that the right side has DC row only.

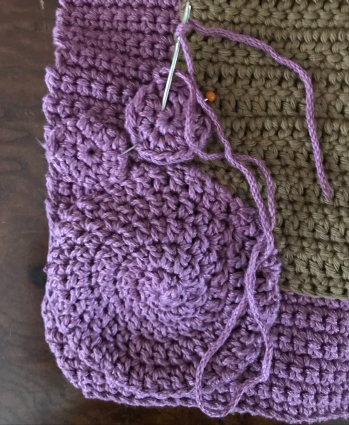
Here is my little bobble project:

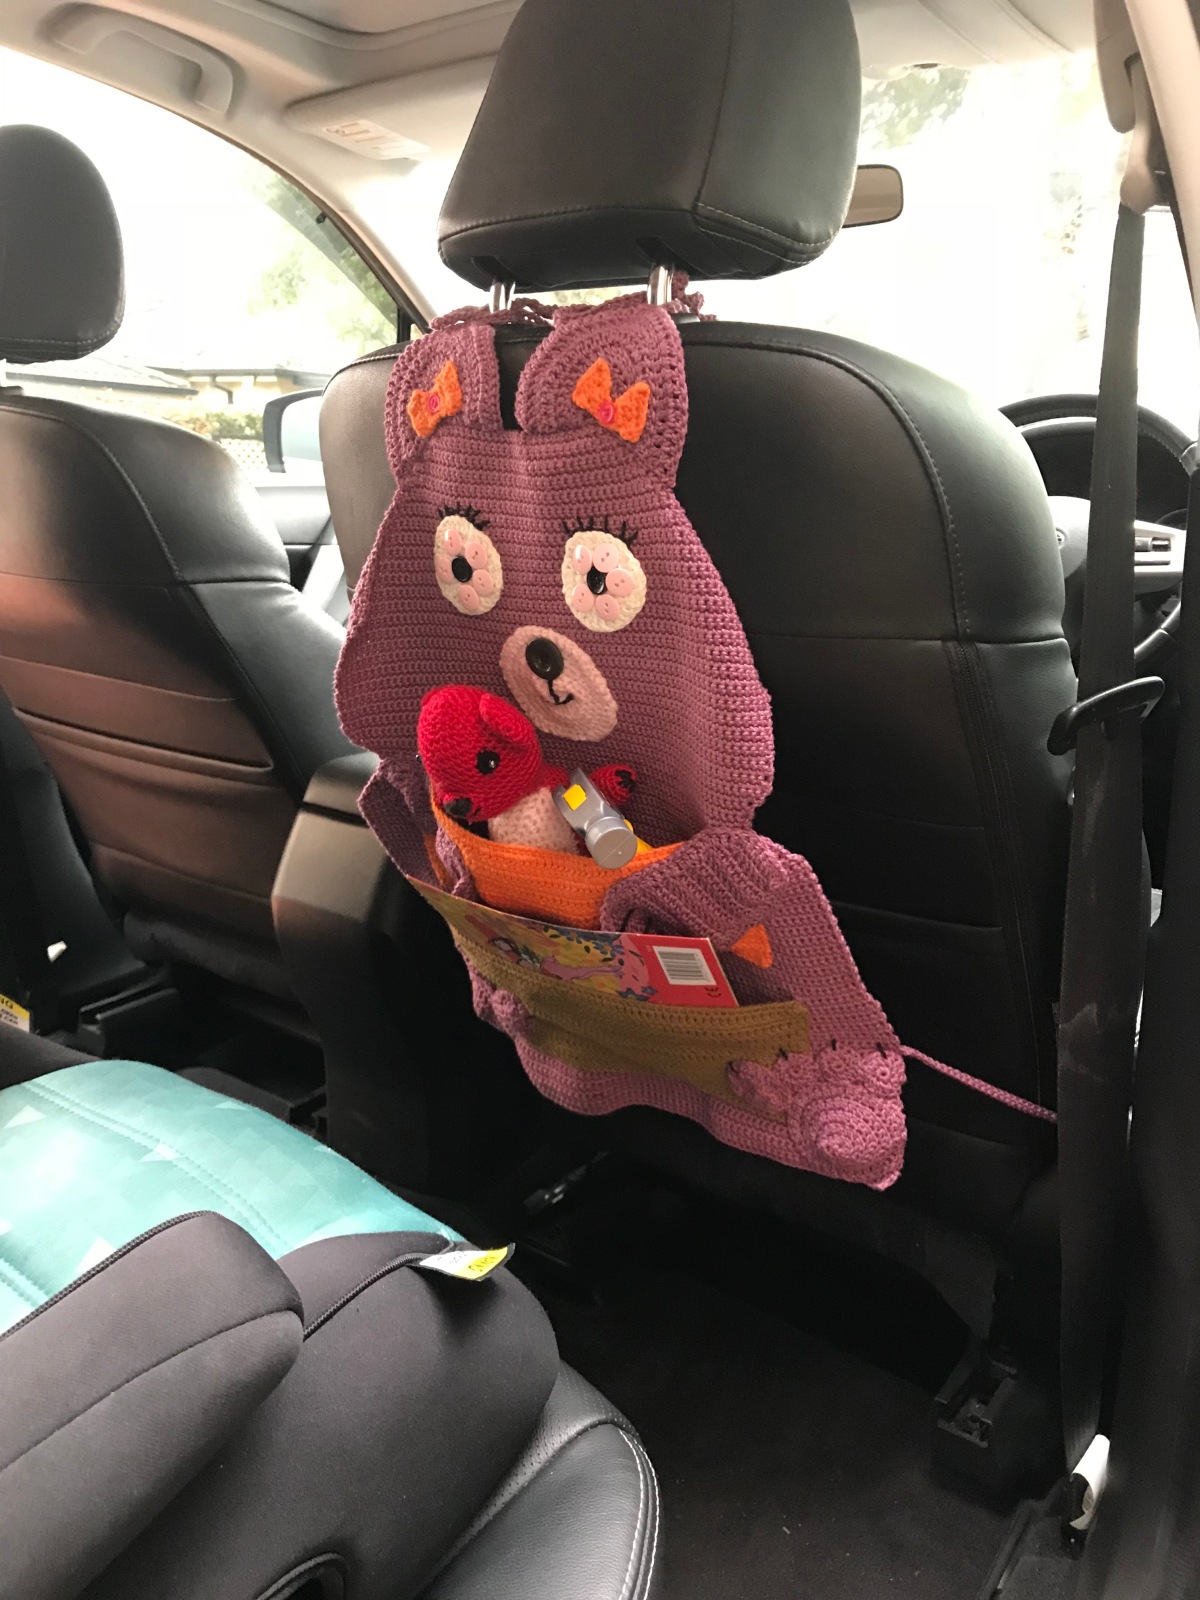
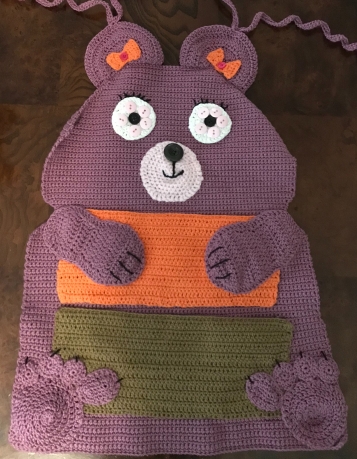
Bear Girl Car Crochet Organiser – Free Pattern

My daughter has a habit of bringing a little toys and their accessories into the car. It is usually left behind and to be honest it is everywhere…Neither I or my husband like it, but what to do with that?

I looked on internet for some tips and ideas and here I found gorgeous car pocket organisers :Teddy Treasure Organiser pattern by Tatsiana Matsiuk and nearly purchased the pattern for the bear and also the owl.

Then 1 click away I paused and asked my “all the time fussy” daughter: “Do you like the owl or the bear?” and she replied: ” I do not like the owl, mum! And the bear is very boyish, I do not like that one either” Well and that was it.

So no pattern purchased, no organiser for our car :(. But the idea was good, just to make it somehow a little bit more girly 🙂 and could work even in our household.

And from that impulse, I developed my pattern for Bear Girl using the original idea of Tasiana Matsiuk’s Teddy Treasure.

I have not re-design her pattern as I have never purchased one so it may be similar and maybe not, I cannot tell.

Supplies:

I have used:

  • 3 skeins of 8 ply 24/7 Cotton Algodon Yarn (purple) by LionBrand, 300g
  • 1 skein of Flinders cotton 8ply (orange), 50g
  • 1 skein of Flinders cotton 8ply (brownish green), 50g
  • 1 skein of Flinders cotton 8ply (white), 50g
  • 1 skein ofBrighton cotton 8ply (black), 50g
  • leftover of 8ply 100# acrylic (pink) ~20g
  • 3.5mm hook
  • 10 medium pink flat buttons, 2 medium black flat buttons, 1 bigger dark-brown button, 2 small red-orange buttons, 2 med
  • embroidery thread black
  • tapestry needle, sewing needle and little bit of black and light pink sewing thread

Gauge: 12 x rows = 10cm, 20 SC = 10cm for the main colour (purple)

The details is on the above picture. I did not used the yellow colour pictured, originally I planned for a bird beak… but then decided not to as I started to make a “bear girl” 🙂

Abbreviations:

CH – chain stitch

MR – magic ring

SC – single crochet stitch

SC tog – single crochet decrease

SC inc – single crochet increase

HDC – half double crochet

DC – double crochet stitch

DC tog – double crochet decrease

SS – slip stitch

(….) – repeat

FO – fasten off

Body:

img_7557.jpg

R1: CH 78 into 2nd CH from the hook SC until the end (77)

R2: CH 1(for turning only), turn work, SC to the 1 – 77 SC till the end (77), continue until the piece measures 24cm.

R3-R8: CH1 (turning), turn work, SC tog, 73 x SC, SC tog, CH1, turn

R9-R10: CH1, turn, 65 x SC (65)

R11-R13: CH1, turn, SC inc, 63x SC, SC inc

R14: CH1, turn, 71 x SC (71), repeat until the section measures 9cm, the entire piece from the bottom to top is 38cm

R15 – R40: CH1, turn, SC tog, SC until 2 last SC left, SC tog. FO after R40.

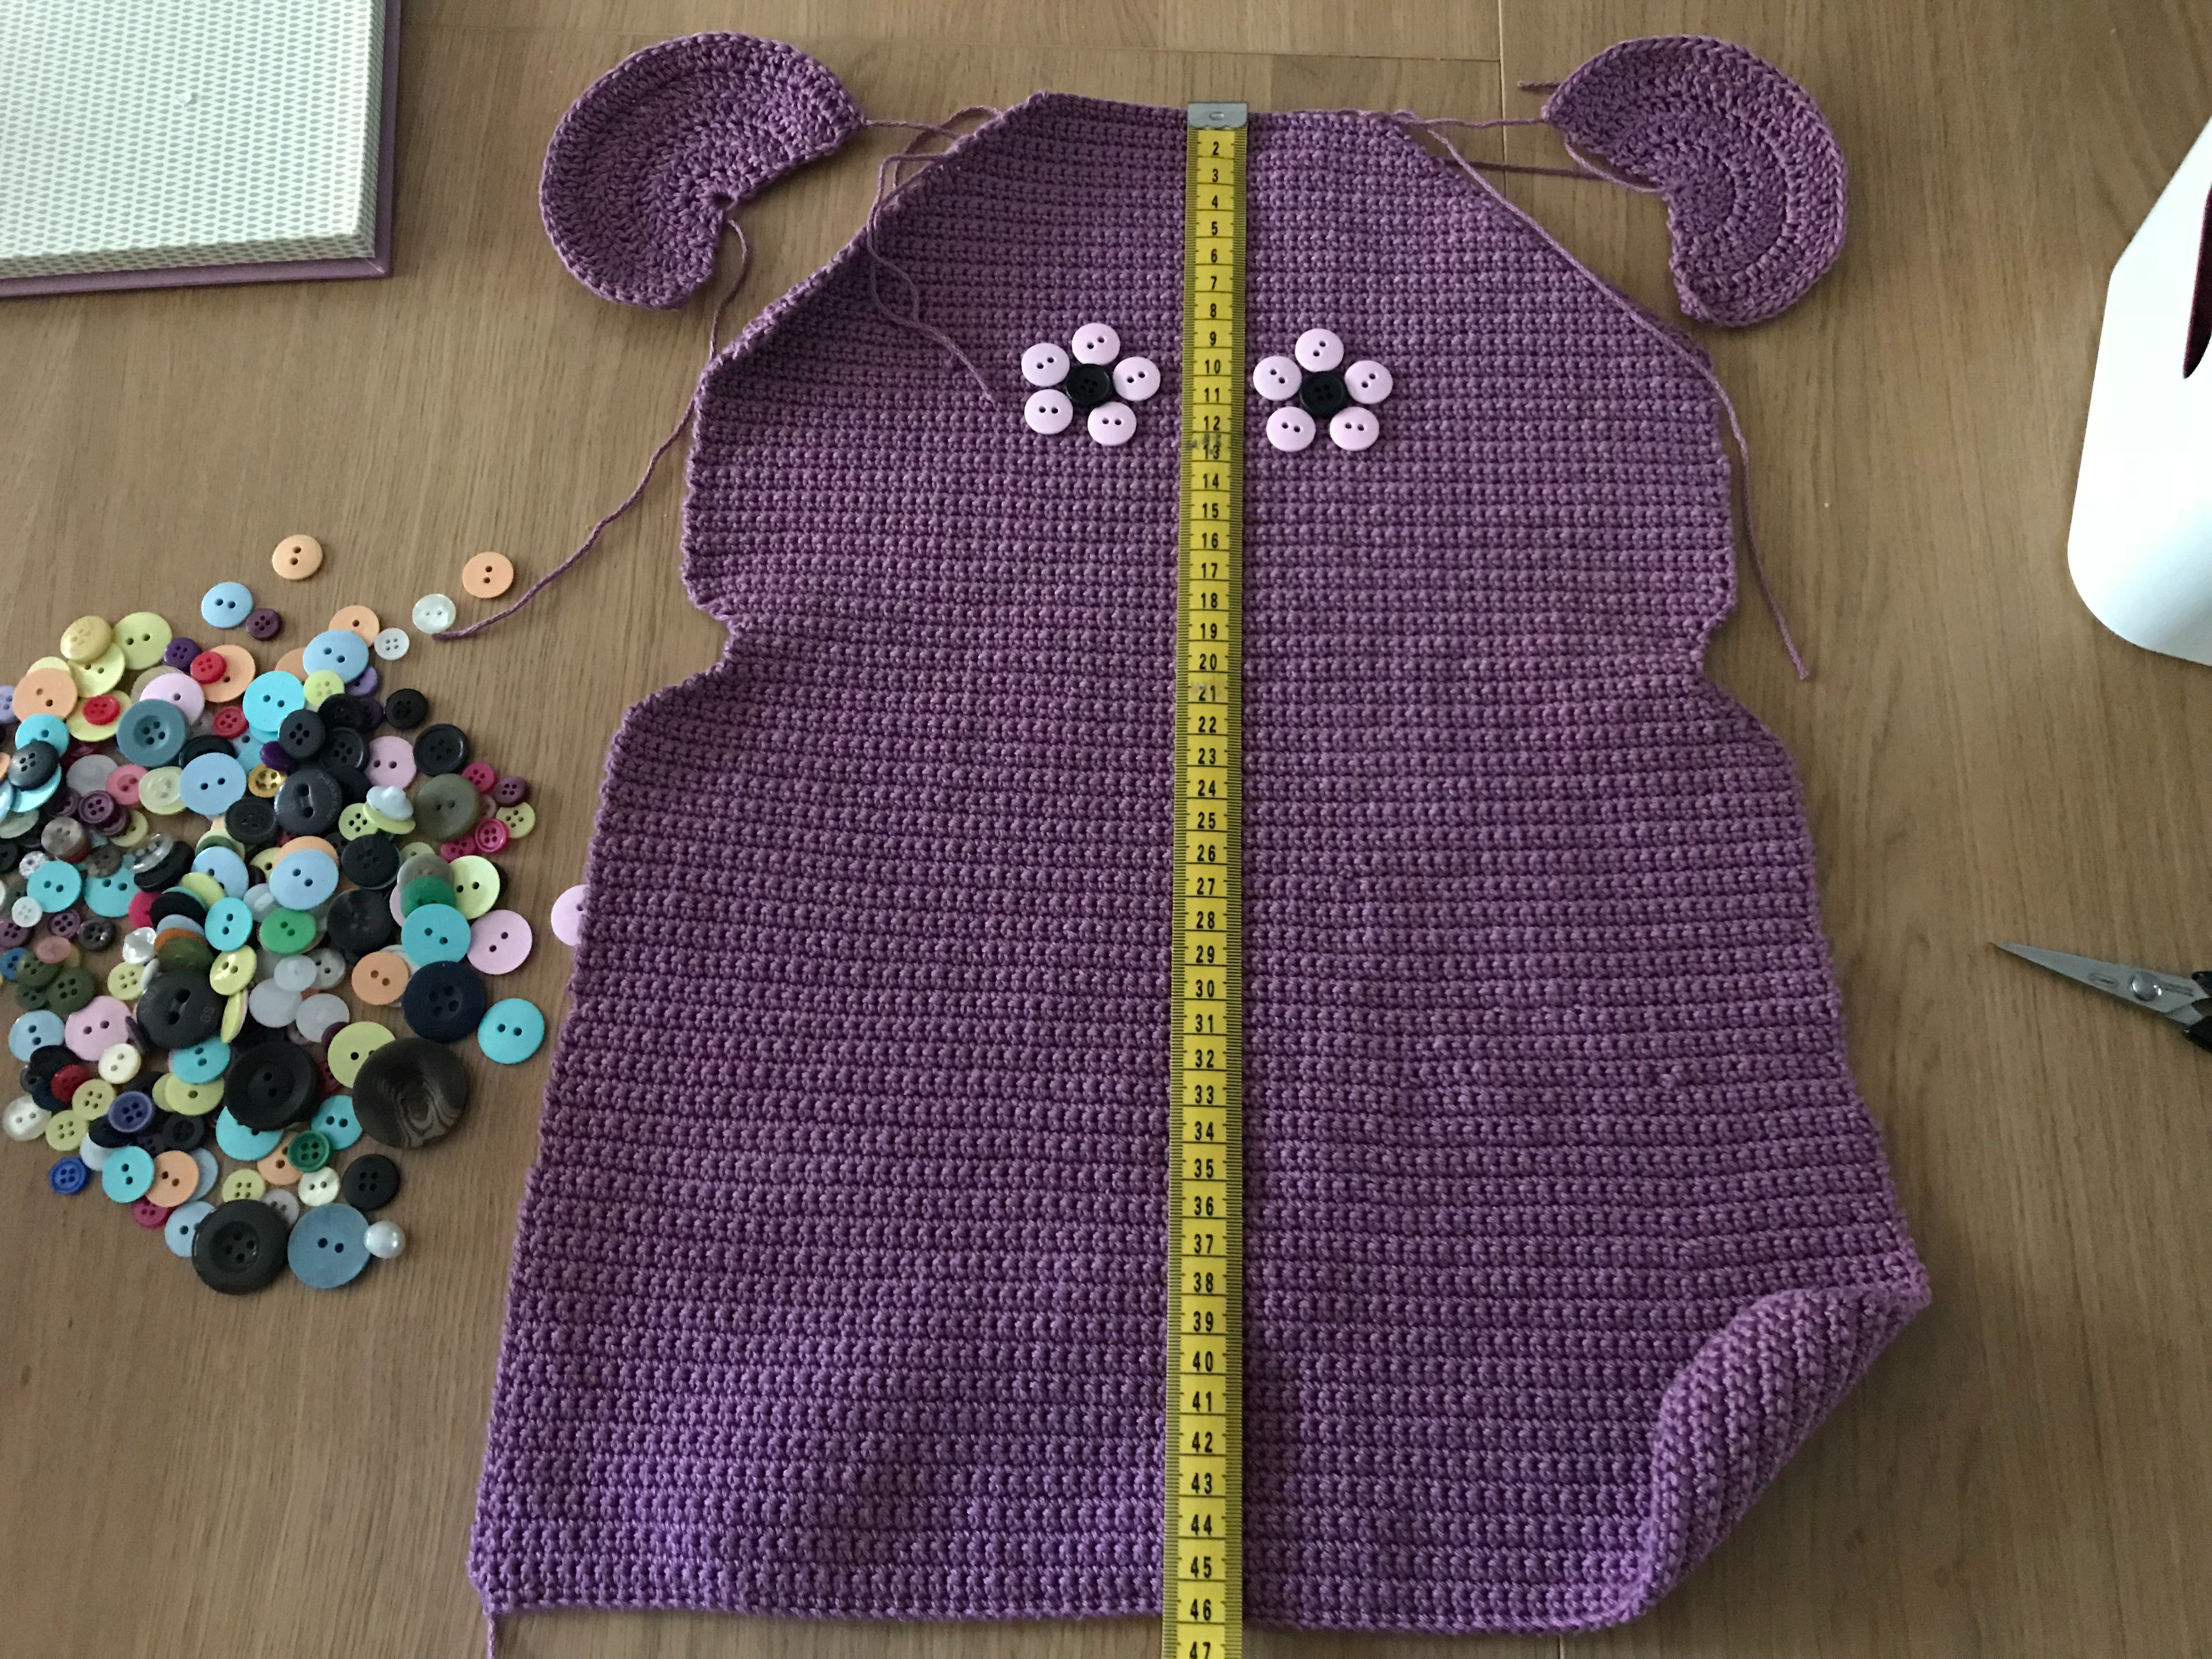
The piece in between the top corners should measure ~ 12cm. The entire work is 48cm as per the above picture.

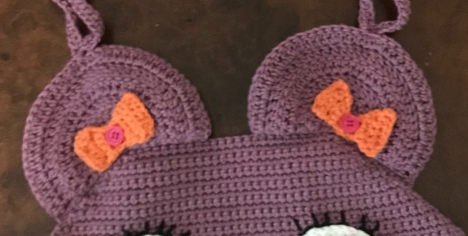
Ear (make 2x):

R1: MR, 8DC in MR do not connect the ring (leave it as semicircle), do not make turning chain in any row

R2: turn, 2DC in each DC around (16)

R3:turn, (DC,2DC in DC,) till end (24)

R4: turn, (2x DC, 2DC in DC) till end (32)

R5: turn, (3x DC, 2DC in DC) till end (40)

R6: turn, (4x DC, 2DC in DC) till end (48), FO

Ear Bow (make 2x):

img_2768.jpg

use the orange cotton yarn

R1: CH8, SC in 2nd CH from the hook, SC till the end (7)

R2: CH1 (turning), turn, SC tog, 3x SC, SC tog (5)

R3: CH1, turn, SC till the end (5)

R4: CH1, turn, SC tog, SC, SC tog (3)

R5 – R7: CH1, turn, SC till the end (3)

R8: CH1, turn, SC inc, SC, SC inc (5)

R9: CH1, turn, SC till the end (5)

R10: CH1, turn, SC inc, 3xSC, SC inc (7)

R11: CH1, turn, SC till the end (7), FO

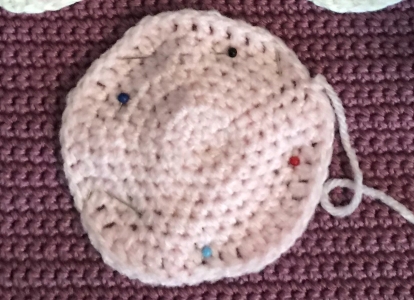
Mouth:

img_2334.jpg

I used the pink 100% acrylic scrap yarn

R1: MR, 6SC in MR, slip stitch into the first SC (connecting into the circle), it is wise to place a marker into the first SC (6)

R2: 2HDC in each SC all around, SS into the first HDC, CH1 (turning) (12)

R3: (2 x HDC in HDC, 2 x HDC) till end, SS, CH1 (18)

R4: (2x HDC in HDC, 3 x HDC) till end, SS, CH1 (24)

R5: (2x HDC in HDC, 4 x HDC) till end, SS, CH1 (30)

R6: (2x HDC in HDC, 5 x HDC) till end, SS, CH1 (36)

R7: (2x DC in HDC, 6x DC) till end, SS, FO (42)

Hand (make 2 x):

img_4439.jpg

R1: CH9, DC in 2nd CH from the hook, DC till end, turn (8)

R2: 2DC in DC, 6x DC, 2DC in DC, turn (10)

R3: 9x DC, 2Dc in DC, turn (11)

R4: 9 x DC, DC tog, turn (10)

R5: 10 x DC, turn (10)

R6: 8 x DC, DC tog, turn (9)

R7: 9x DC (9), turn

R8: 2x DC in DC, 7x DC, 2x DC in DC, turn (11)

R9: 2x DC in DC, 10x DC, turn (12)

R10: 2x DC in DC, 10x DC, 2x DC in DC, turn (14)

R11: 14x DC, turn (14)

R12: 12x DC, DC tog, turn (13)

R13: DC tog, 11x DC, turn (12)

R14 – R16: DC tog, 8x DC, DC tog, turn

R17: 3 x DC tog, SS to the next DC, place marker and DC around the hand

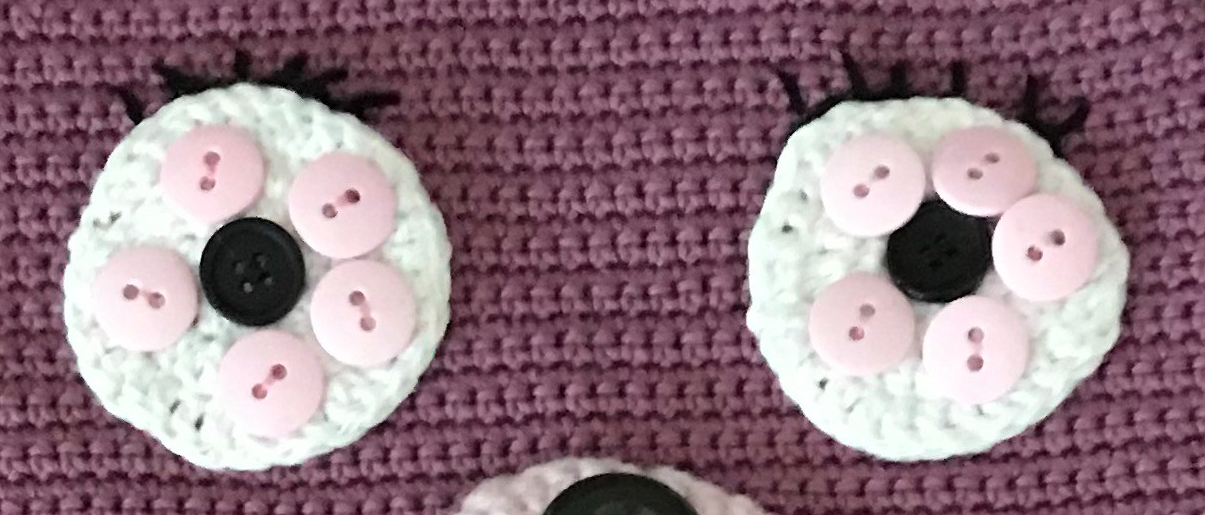
Eye (make 2 x):

I used white cotton yarn.

img_7355.jpg

R1: MR, 8 HDC in MR, SS to the first HDC (connect into circle), CH1

R2: (2x HDC in HDC) till end, SS, CH1 (16)

R3: (2 DC in HDC, DC) till end, SS, CH1 (24)

R4: (2DC in DC, 2 x DC) till end, SS, FO (32)

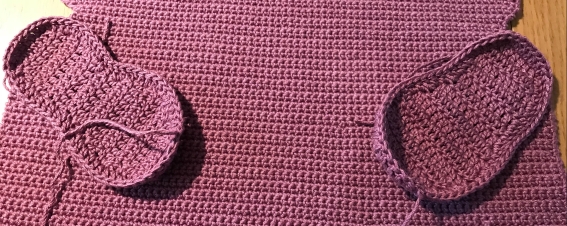
Foot (make 2 x):

img_5894.jpg

R1: MR, 8x DC in MR, SS into the first DC (connect circle) (8)

R2: 2x DC in each DC around, SS (16)

R3: (2 x DC in DC, DC) till end , SS (24)

R4: (2 x DC in Dc, 2 x DC) till end, SS (32)

R5: (2 x DC in Dc, 3 x DC) till end, SS, FO (40)

BIG TOE (make 2 x )

R1: CH8

R2: 2SC in CH (2nd from the hook), 6 x SC, 2SC in last CH – crochet around the other side of the chain now 7x SC till end, SS to the first, place marker

R3: 2 x DC in 1st SC, 2x HDC, 9x SC, 2 x HDC, 2DC in SC, SS to the 1st stitch

R4: CH1, 6x DC, 2x (2 x SC in SC), 7x DC, SS to the first stitch, FO

TOES (make 6x)

R1: MR, 8SC in MR, connect into circle with SS (8)

R2: 2 HDC in each SC, SS to the first, FO (16)

Pockets (make 2 x in different colours):

img_1966.jpg

I have used orange and brownish-green cotton yarn to create the pockets. The theme behind this was honey in a jar 🙂 🍯.

R1: CH59, SC in 2nd CH from the hook and SC till the end, turn, CH1 (58)

R2: 58 SC, turn, CH1 (58)

R3: 58 DC, turn, CH1 (58)

repeat row R2 and R3 to your liking or to the size of my pocket, which was 11cm in height, fasten off.

Strings, assembly and decorations:

IMG_1200

I connected the purple cotton yarn on top an ear and chain 51CH (25cm). SC too the second CH from the hook down towards the ear on the right side of the left side of the chain.

1SC in the ear on the left side from the first string attachment. Chain another 51CH and repeat the process of making the string with SC along the chain, SS to the ear and FO.

Repeat on the other ear. These strings are to be attached to the head rest poles on your car seat.

Attach the purple cotton yarn just above the toe to the side of the body and chain CH 141, SC to the second CH from the hook and SC to each of the chain stitch finishing with SS to the side of the bear body, FO. Repeat on the other side. These strings are to attach the organiser at the base of the car seat to provide more stability, when the organiser is loaded with toys.

ASSEMBLY & DECORATIONS

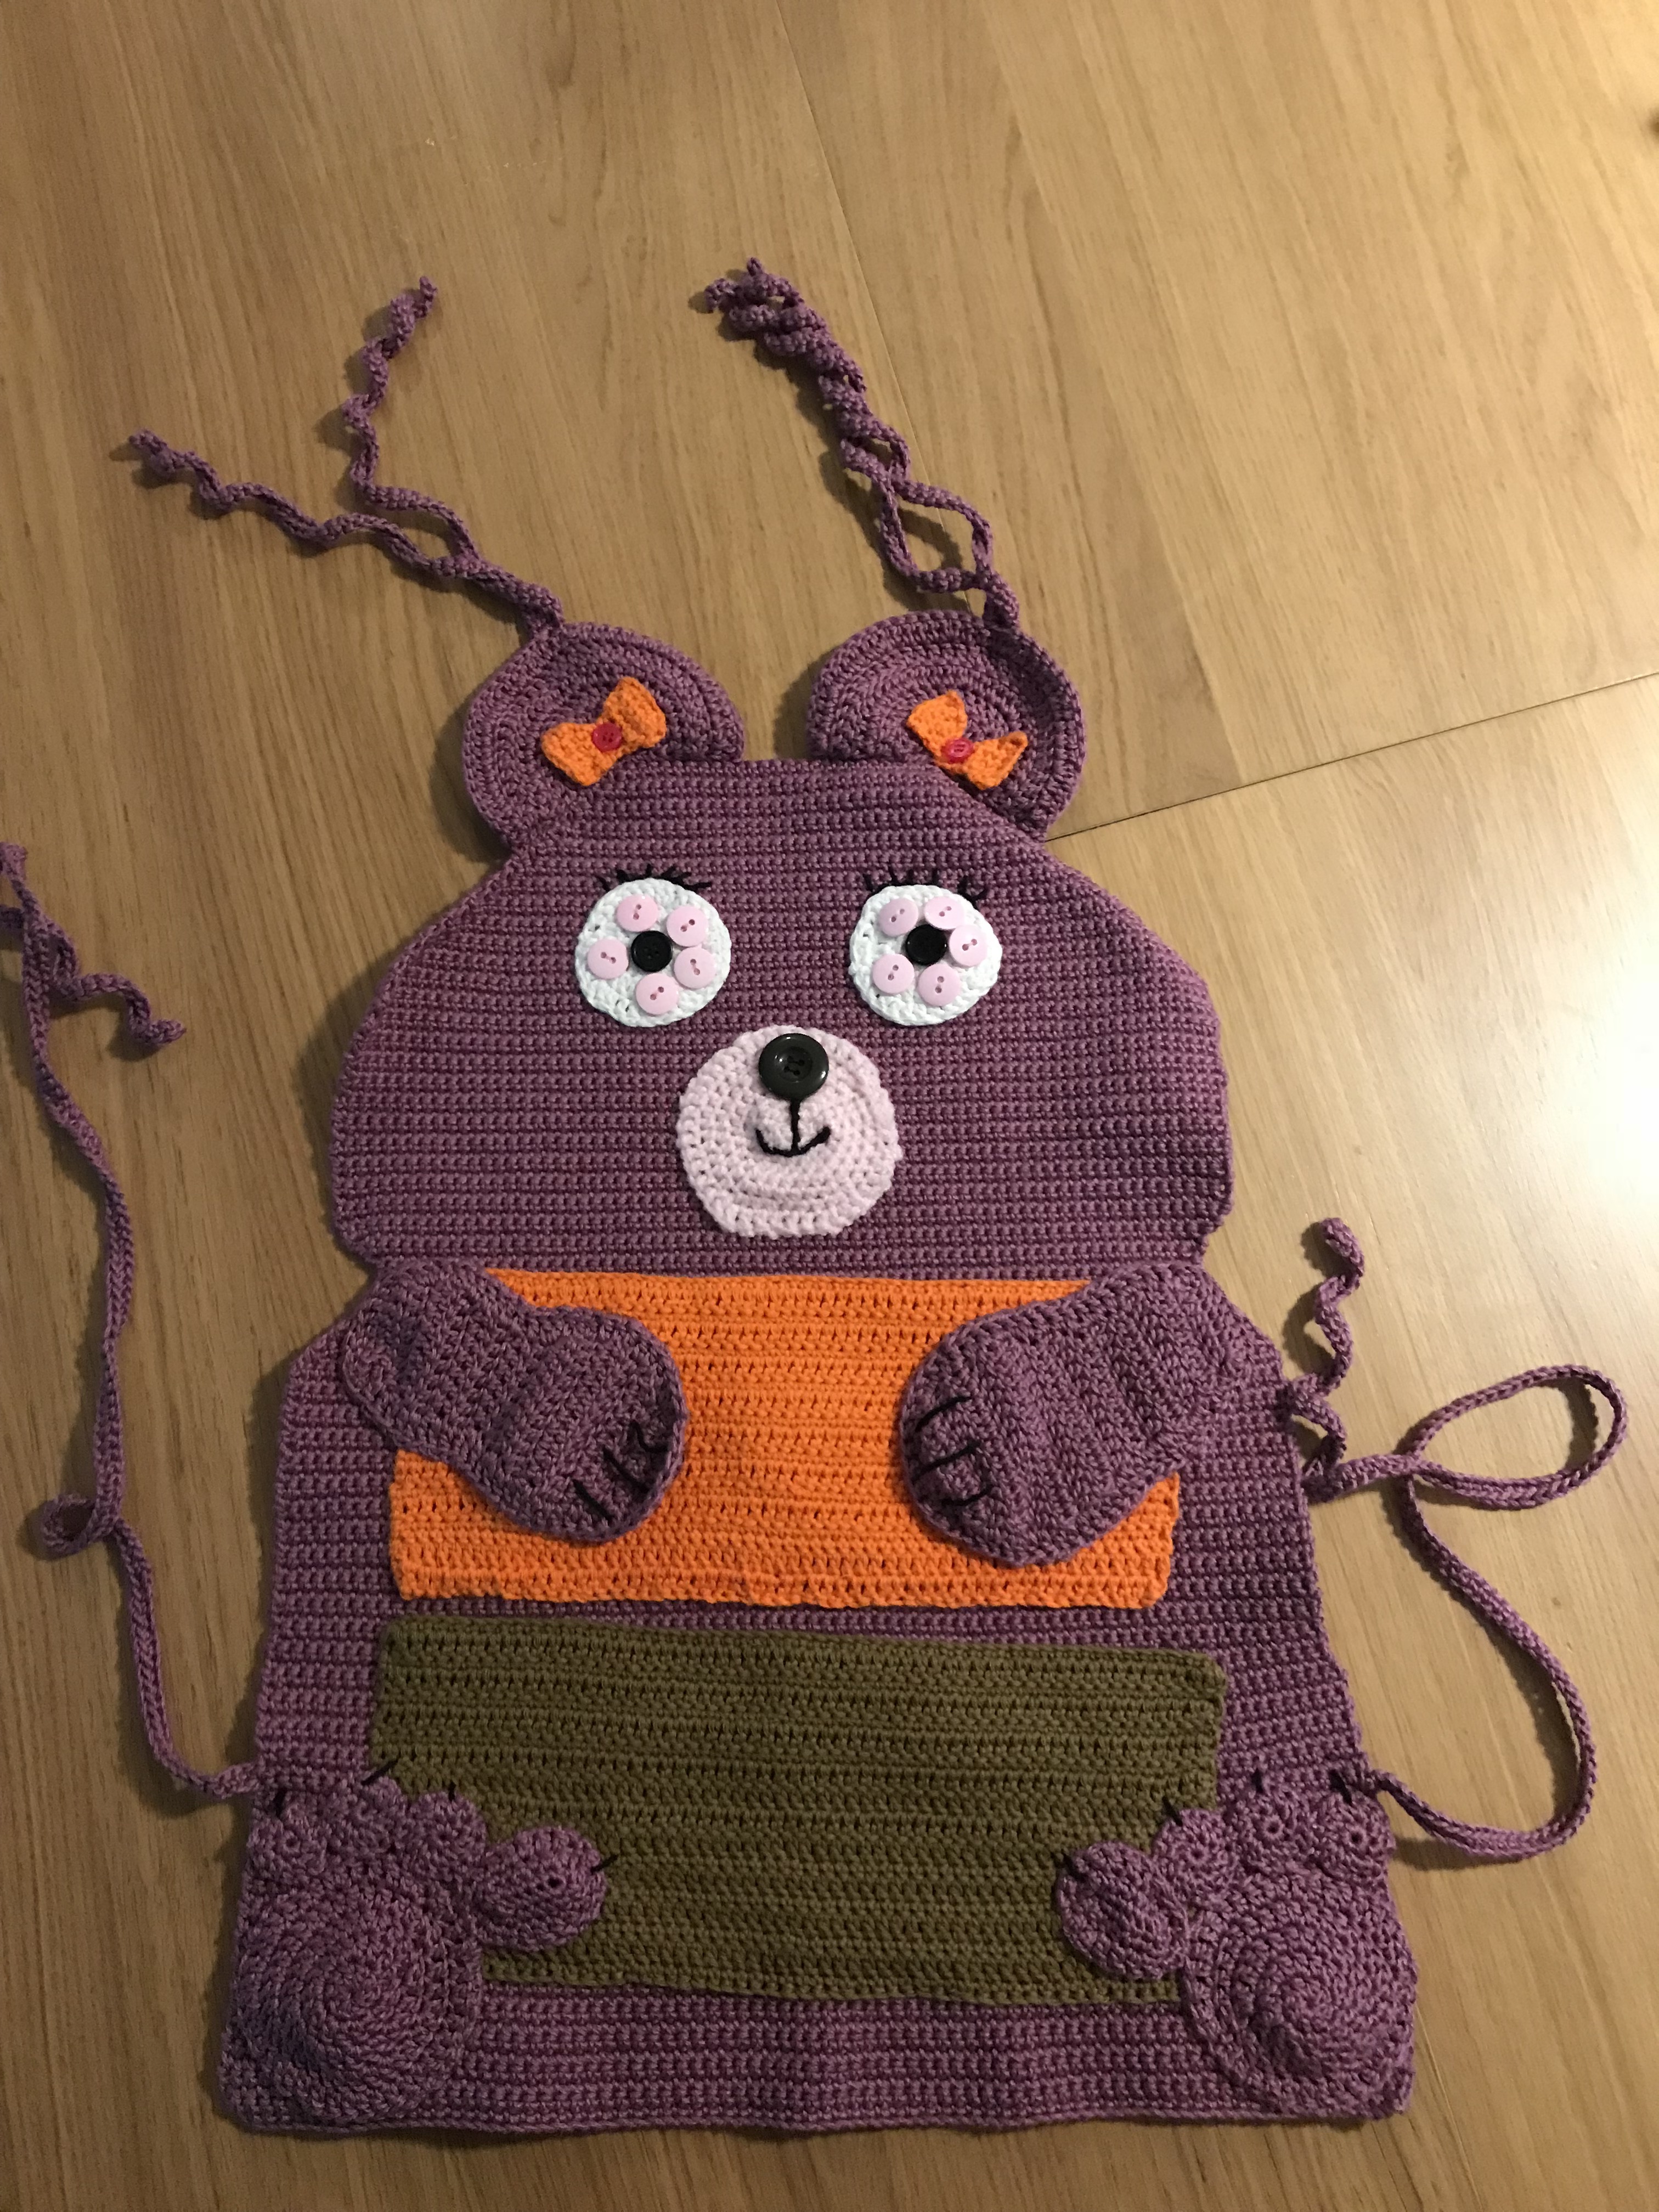
All the pieces are sewn with the particular coloured yarn onto the organiser body. Attach the ears, attach the bows and 2 x reddish-orange buttons in the middle of each ear bow.

I used 5 x pink buttons to create the eye iris and 1 x black for the pupil to create 1 eye. I sew them on using light pink sewing thread and black for the pupil. Also, I did embroider the eye lashes using the black embroidery thread.

I made the happy mouth using a piece of black cotton yarn, which was also used for claws on hands and feet.

Attach the pockets and then the hands, placing them over the “honey” part. I did not sew them along the way but only at the joint and side of the arms, creating a pockets for pencils. That means only the arm and the sides of the arm are attached to the 3/4 of the arm ~ probably the wrist, where it is left loose.

Attach the feet with all toes and big toes.

Weave all the loose ends you may have and place the organiser in the back of the car seat – ready for use.

My daughter is super happy as it is girly enough and keeps all the necessary knick – knacks in one spot! 😀


Crochet Minion Dog Outfit – (L) Free Pattern

Hello everybody, my nephew asked me if I am able to make a jumper for his still a puppy English Staffordshire Bull Terrier. His name is Pablo and you can follow his growing up journey here:

Pablo Blue Staffy

Well, there was no other specification, than that it should be a jumper to keep him warm during winter cold nights. I mean Australian winter cold nights in New South Wales, so just to explain that you understand – very mild winter, ~ minimum of 2 degrees Celsius in a very cold morning at the place where Pablo lives and definitely no snow 🙂 In case you would like to make this jumper for a dog living in a different geographical place, it is worth considering that you will need a different type of yarn, thickness and something washable as snow makes it wet, muddy and dirty.

Make a jumper for a dog ! Easier said than made 🙂 This was a challenge!

If you wanna make a dog outfit and you do not have any clues, you could follow the steps below, which I have put together for any clueless crocheters out there wanting to make a dog jumper:

1. Measure the dog

This step is super important! I took Pablo’s measurements all around him, not even knowing which ones I need. I follow basic arithmetic principles – measuring of length, circumference and width. I took advantage of having him here for a short visit and measured the following:

  • length of the top of the back (neck to tail)
  • circumference of his all legs – one by one, just in case they different 🙂 – everyone is unique
  • circumference of his neck (Staffy is muscly and his neck is a stroooong one)
  • diameter of his head (again, he has quite big head compare to his body)
  • distance between front legs
  • distance from the bottom part – neck to the most important part (it is used for wee wee 🙂 )

2. Choose a yarn, hook & colours

I did choose a 10 ply acrylic yarn and 5.5mm hook, that the project will be quick and stretchy. 100% Acrylic yarn is sturdy (does not wear off easily) & machine washable just in case he gets dirty. I did not know what pattern or colours at the beginning to choose from, but found this super cute video on internet here : Minion Dog this one was obviously made for super teeny-tiny dog compare to Pablo).

I fell in love with the idea of making a minion jumper! I rushed to my local craft store and got:

  • 300 grams of a dark blue
  • 150 grams yellow
  • and found at home less than 50grams of white, less than 20 grams of grey and probably 50grams of black 100% acrylic yarn

A bit of arithmetic

All yarn is 10ply thickness, however you can use any other thickness if you wish. As you will read later in this article, I did not follow the written pattern, rather the layout of the pattern and Pablo’s dimensions.

That gives you a free choice of yarn thickness and hook size. You just need to chain so many stitches to obtain the size in [cm] what you have measured. E.g. for 1cm measurement it took 5 chain stitches with 10 ply yarn and 5.5mm hook. With thinner yarn you will use smaller hook (to have the same tension) and do more stitches within 1 cm.

3. Pattern

To make a dog jumper I followed this original pattern Large Dog Pattern as despite his height Pablo fits to LARGE size.

I did not follow the entire pattern only the sizing jumper layout at the back of the pattern. I used for the entire jumper double crochet stitches, just to make it simple and plain. The entertaining motif is the minion look so I did not want to overcomplicate the stitches.

Back 

Starting with blue colour and changing to yellow just when the back is passing the “wee wee point” at the bottom.

When the pattern is not square but is narrowing I did crochet together 2 DC & 2 DC on each side each row until the measurements were exact the same I needed for Pablo.

The rest of the jumper back body was made in yellow, up until start of the front legs. Switched to black and did 3 rows in black. Switched back to yellow and followed the shape of the pattern to the end. I left a bit wider neck opening as Staffies have very muscly neck compare to the written pattern layout mentioned above.

Front

The entire pice was made in yellow following the shape pattern and comparing to Pablo’s sizing. I used DC stitch and 2x DC & 2 x DC together (decrease) where needed based on the pattern shape and dog sizing.

Jumper Assembly

The jumper is sewn together using tapestry needle and yellow yarn. Just make sure that you put together only the sides and leave the opening for front legs ( I did this a bit wider as Pablo is muscly dog). The jumper is also sewn at the top leaving opening for neck (creating arms).

Minion Eyes:

2 x circles made from white (probably 7cm in diameter – larger) and 2 x circles made in black (3.5cm diameter – smaller).

Basic circle making logic:

I started with magic ring (MR)  and 6 DC in MR, connect with slip stitch to make a circle. To each DC crochet 2 DC in the next round (increase), connect with slip stitch. At the end of the round you should have 12 DC. Next round repeat 1 x DC in DC, 2DC in 1 x DC to the end of the row. Connect with slip stitch. Next round repeat 1 x DC in DC, 1 x DC in DC and 2 DC in 1 X DC to the end of the round and connect with slip stitch. You follow this logic (slow increase in each round) until you happy with the size of the circle.

Grey edge of the eye – goggles:

Chain enough stitches with grey yarn, enough to cover your white circle circumference. Connect with slip stitch to make a circle.

SC into each chain stitch around and connect with slip stitch. Next round SC BACK LOOPS ONLY in each SC around, slip stitch and finish off. Leave a longer end for sewing.

Eyes Assembly:

Starting with white circle, position black circle (pupil) into the centre of the white and place them onto the back of the jumper where was the 3 black rows. Black row should be in the middle of the eye – making a goggle strap. Pin it and position the other eye. Once you happy with how it looks sew them on the jumper. Sew on the white edge the grey circumference for goggles.

Embroider the face with black yarn for thicker effect or embroidery thread for more subtle look.

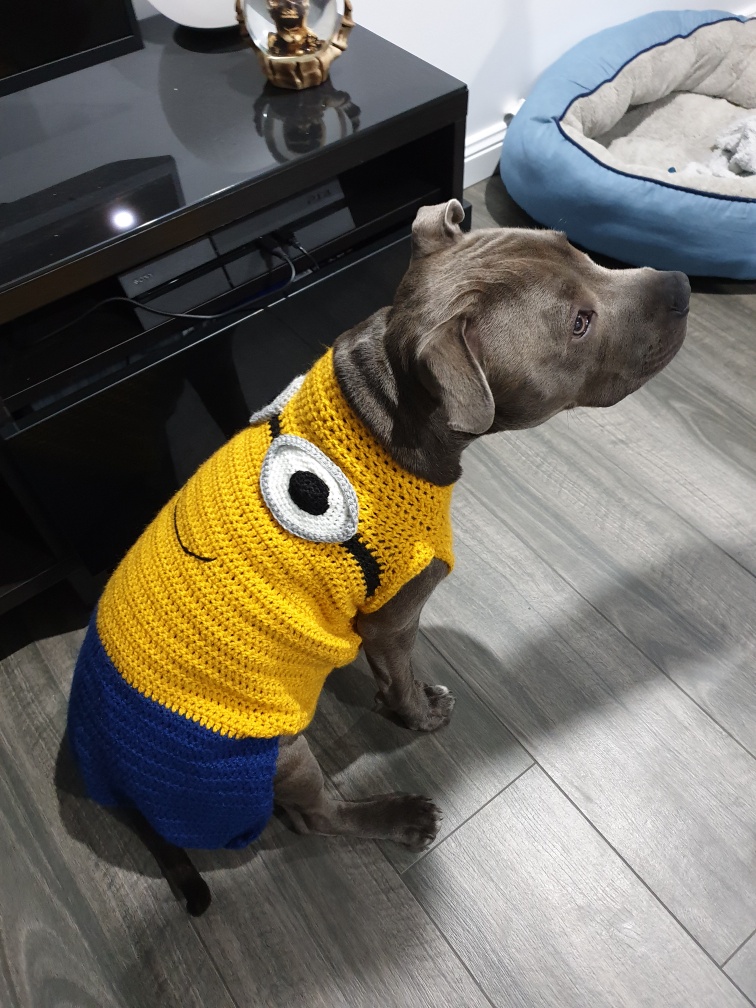
And voila, you have a minion jumper !

Pablo in his new jumper:


Boy Hat – Free Pattern

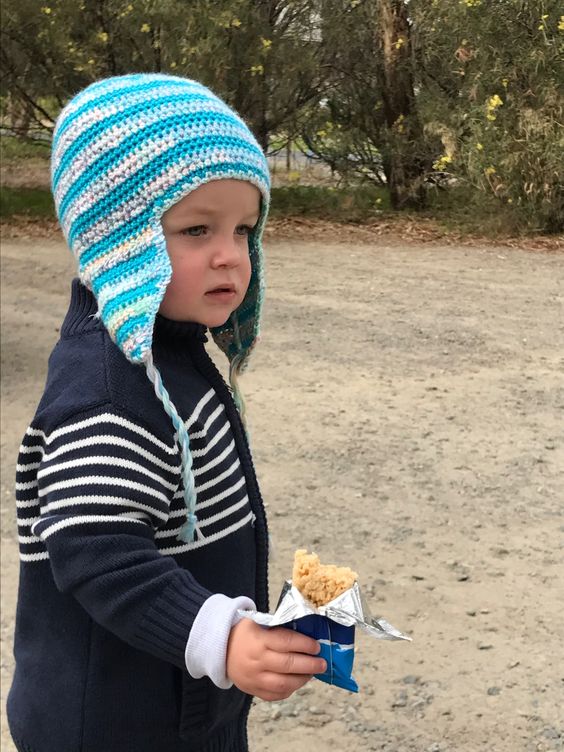
I have used this Baby Blues Hat by DROPS Design pattern to create a hat for my son.

It is very easy pattern with good instructions to follow. It is very good for beginners and I would say quite quick project too (e.g. I spent a probably an hour a day and took me a week to complete the hat).

I gave it a little twist with a little bit different colour scheme and edging.

Here is the final result:

2fd42b865eed6520eec394ff70f2892a

Let me know, if you like it 🙂

I.

Design a site like this with WordPress.com
Get started